Working with cement board or fiber cement siding can raise a lot of questions. This is especially true when figuring out which fasteners to use. Should you go with nails or screws? Do you need specialized hardware, or can you use what's already in your toolbox?
We compiled this FAQ and buying guide to answer the most common questions. Whether you are a contractor aiming to streamline your workflow or a DIY enthusiast tackling cement board for the first time, these insights will help you avoid common mistakes and choose the right fastener for the job.
FAQ: Your Cement Board Screw Questions Answered
Q1: What screws should I use for cement board?
A1: Use corrosion-resistant fiber cement screws specifically designed for attaching cement board. These screws, also known as cement board screws or backer board screws, typically feature self-countersinking heads and sharp or self-drilling tips. For wood framing, a #8 x 1-1/4" screw is standard. For steel framing, use a self-drilling screw with reamer wings to prevent board lift.
Do not use regular wood or drywall screws. They will not hold up or perform correctly.
Q2: Can I use drywall screws on cement board?
A2: No. Drywall screws lack the corrosion resistance and structural strength needed for cement board. Their thin shafts and bugle heads often strip or snap under load. Always use coated cement board screws to ensure long-term performance in high-alkalinity environments.
Q3: How do I screw into cement board properly?
A3: Drive cement board screws perpendicular to the board with steady pressure. Use the correct drive bit (e.g., T-25 Torx, #2 Phillips) and stop once the head is flush. Space screws 6–8 inches apart across the field and 1/2" to 2" from edges. Pre-drilling is not needed with high-quality self-tapping screws.
Q4: How far apart should the screws be in cement board?
A4: Cement board screws should be placed every 6 to 8 inches along each stud or joist and around the board’s perimeter. Avoid placing screws too close to the edge, maintain a 1/2" to 2" buffer to prevent cracking or crumbling.
Q5: How many screws do I need per sheet of cement board?
A5: A 3×5 foot cement board typically requires 25–30 screws using 6–8" spacing. To estimate quantity for your project, calculate square footage and use manufacturer-recommended fastener spacing guidelines.
Q6: Do I need to pre-drill holes for cement board screws?
A6: Most modern fiber cement screws are self-tapping or self-drilling, eliminating the need to pre-drill holes. Many feature scoop-style or fluted drill tips that easily penetrate cement board without cracking or splitting.
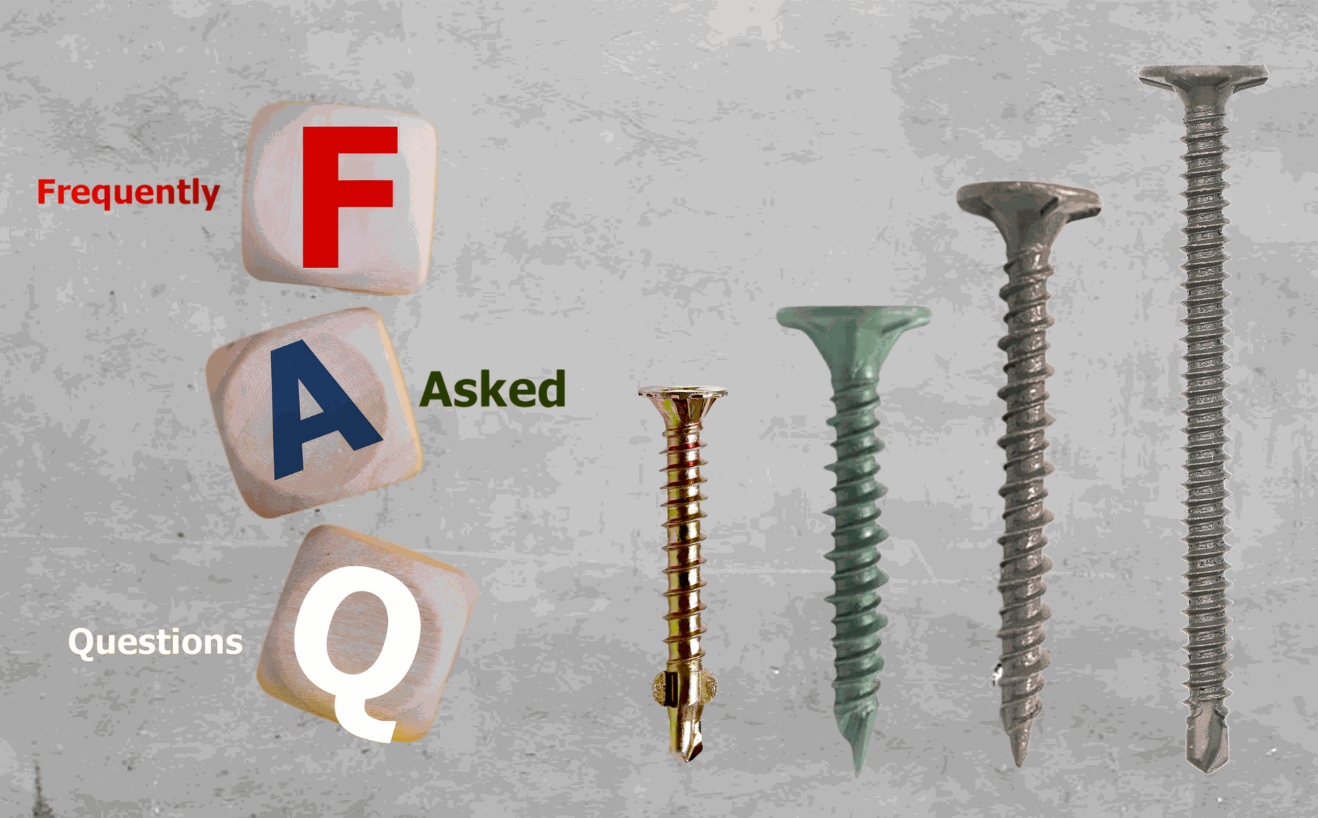
Q7: What different types of cement board screws are available?
- Sharp-Point Screws: Best for wood framing.
- Self-Drilling Screws: Ideal for steel framing with drill tips and reamer wings.
- Flat-Head Screws: Designed for flush installations under tile.
- Wafer-Head Screws: Provide wider holding surface, used for siding.
- Premium Designs: Like Fong Prean's 12-V-ribs head with cutting nibs for precise countersinking.
For in-depth help on selecting based on substrate or climate, refer to our guide to choosing the best fiber cement screw.
Buying Guide: How to Choose the Right Screw
Now that we’ve addressed specific questions, let’s summarize the key considerations when buying cement board screws. Use this checklist to evaluate your options:
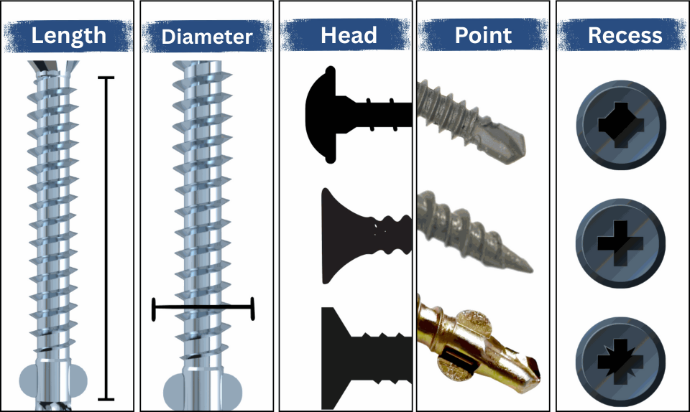
- Length: Choose a length that will give sufficient penetration into your framing. Common lengths are 1-1/4" and 1-5/8". As discussed, use ~1-1/4" for 1/2" board on wood, and longer for thicker boards or if going into metal studs (where 1-5/8" is often used). If in doubt, longer is usually better (as long as it doesn’t poke out the other side) because you want a firm grip. For floors with an extra plywood layer, or two layers of backer, adjust accordingly. Remember that adding thinset under backer (a common practice) doesn’t change screw length needs – it just fills voids.
- Diameter/Gauge: Stick with the recommended size for your board. #8 is most typical. Some brands use #9 for a bit more beef. The screw’s packaging or description will say something like “#8 x 1-1/4” or “#9 x 1-5/8”. Using the specified gauge ensures the screw fits any pre-drilled holes in the board (some boards come with dots or pilot divots) and has the proper head size to secure the board.
- Head Style: Decide between wafer head vs countersinking flat head. Wafer heads tend to be used in siding or surface-mounted applications (they are flat and low-profile but not tapered). Flat countersunk heads are tapered to dig in flush. Both should have self-drilling nibs/ribs. If your project will have material covering the board (tile, mud, etc.), you’ll likely use flat head. If the screw heads will be visible or just painted (like some siding installs), wafer might be better. Check that the head has those cutting ribs or teeth – this feature is what enables a flush finish without spin-out.
- Point Type: Look at what the screw’s point is designed for. Packaging will indicate if it’s for wood or metal. A “Type-17” or sharp point is for wood; a “self-drilling (TEK) point” is for metal; some might say “spoon point” for heavy fiber cement. Choose accordingly. If you have both wood and light metal in the structure, opt for screws with wings and drill point so you get the best of both (commonly listed as “for cement board to steel or wood”).
- Drive Recess: Phillips is common but prone to cam-out under high torque. If available, you might prefer square drive or star (Torx). Some brands have moved to Torx/star drives for cement board screws to improve grip. If you get Phillips (which is fine), maybe invest in a drywall dimpler bit or an impact-ready bit to minimize stripping. Check the box so you know which driver bit to use (some include a bit in the box).
- Quantity & Budget: Figure out how many screws you need (see Q5 above). Cement board screws are sold in small boxes (100-200 pcs for DIY jobs) or large buckets (500-1000 pcs) for bigger jobs. It’s often more cost-effective to buy a bit more in bulk than multiple small boxes. Price-wise, coated steel screws are relatively inexpensive; stainless screws cost more (maybe 2-3x the price), but for a small area that extra cost might be negligible compared to the peace of mind. If you’re a contractor, having both on hand (coated for most jobs, stainless for special cases) is a good strategy.
By choosing high-quality screws and following best practices, you’ll create a strong bond between your cement board and its supports, whether it’s under a tiled floor, behind a tub surround, or on an exterior wall. Your tiles won’t crack, your siding won’t blow off, and your cement board will stay exactly where it should – giving you a long-lasting, professional result.
Don’t miss our in-depth pillar article “How
to Choose the Best Fiber Cement Screw for Your Project,” which goes even
deeper into the topic and provides a comprehensive look at selecting and using
these screws (perfect if you want to build your expertise or tackle larger
projects). By leveraging these resources, you’re well on your way to mastering
cement board installations. Here’s to a successful project with screws that hold
fast and strong for years to come!